




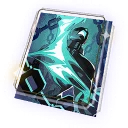
Understand Hidden Shadow
Useful when…
- A Nihility wearer whose Skill is followed by a Basic ATK against an enemy.
- An ATK-oriented build that can make use of the added damage on that next Basic ATK.
How does the added damage work?
After using Skill, the wearer's next Basic ATK deals Additional DMG equal to 60% of ATK at S1, rising to 120% at S5, to the target enemy. The effect applies to the next Basic ATK and is described as Additional DMG; it does not say that the Skill itself gains damage or that every Basic ATK is empowered.
Who can use it?
It is most relevant when the wearer can use Skill and then Basic ATK, and their ATK supports the extra damage. If the wearer needs Effect Hit Rate and Energy against DEF-reduced enemies, Before the Tutorial Mission Starts offers those benefits instead. Boundless Choreo offers CRIT Rate and additional CRIT DMG against Slowed or DEF-reduced enemies. Along the Passing Shore increases CRIT DMG and damage against targets afflicted with Mirage Fizzle, with another Ultimate damage increase. Each asks for a different stat or condition.
Investment
Promotion advances the Light Cone through six stages; the supplied examples show Credit and Nihility or Artifex materials at selected stages. Superimposition increases the added damage from 60% to 120% of ATK. Extra copies are most relevant if the wearer reliably follows Skills with Basic ATKs; promotion can be considered for base stats independently of that trigger pattern.
Limitations and tradeoffs
- The effect requires a Skill followed by the next Basic ATK.
- Added damage is directed at the Basic ATK's target and scales from ATK.
Common mistakes to avoid
- Applying the added damage to the Skill instead of the next Basic ATK.
- Assuming every Basic ATK receives the added damage without a preceding Skill.